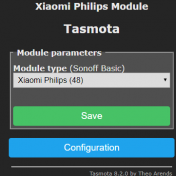
Unique configuration of each Tasmato Device Open the webserver of the module by enter the IP address in a browser Go to Configuration –> Configure Other Set Friendly Name 1 to a custom name Enable MQTT, if you want to use it Save the configuration Go to Configuration –> Configure… Read more »
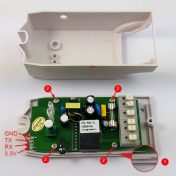
Connect a USB to UART adapter to the module Connect a simple USB to UART adapter to the Sonoff module (Attention: Make sure it is a 3.3V adapter or the jumper is set to 3.3V. 5.0V will damage the module) I used this adapter: USB zu TTL konverter UART modul… Read more »
Connect a USB to UART adapter to the module Connect a simple USB to UART adapter to the Sonoff module (Attention: Make sure it is a 3.3V adapter or the jumper is set to 3.3V. 5.0V will damage the module) I used this adapter: USB zu TTL konverter UART modul… Read more »
Install Arduino IDE (https://www.arduino.cc/en/main/software) Integrate ESP8266 board in IDE Open Arduino IDE Open File → Preferences (Arduino → Preferences on Mac) Insert the in the textfield Additional Boards Manager the url:http://arduino.esp8266.com/stable/package_esp8266com_index.json and select OK. Open the Board manger under Tools → Boards… → Boards Manager… Scroll to esp8266 by ESP8266 Community and click on it. Install the last version Download the newest Tasmota source code… Read more »
Home Assistant Config Helper is add-on for Visual Studio Code. The main advantage of the add-on is the auto completion of the entity-id’s from your Home Assistant configuration. Installation Installing Visual Studio Code (https://code.visualstudio.com/) Installing Home Assistant Config Helper Add-on from the marketplace (https://marketplace.visualstudio.com/items?itemName=keesschollaart.vscode-home-assistant) Open Visual Studio Code Settings Now… Read more »
http://yourduino.com/sunshop//index.php?l=product_detail&p=60
Connect a USB to UART adapter to the module First remove the dome of the bulb. A good possibility is to cut around the dome with a cutter knife. Afterwards you can lift the dome with a flat object Than the isolation around the middle PCB must be removed. Simply… Read more »
Install nmap on raspberry pi: Add following configuration in configuration.yaml file. Home_interval are minutes that Nmap will not scan this device, assuming it is home After a restart of Home Assistant the tracker will scan the network and list all devices in the file known_devices.yaml. Now some options can be… Read more »
Mit Hilfe des Mi Flora Gateway werden die Sensordaten der Xiaomi Mi Plant Flower Care per Bluetooth ausgelesen und anschliessend per WiFi an einen MQTT Broker gesendet. Projekt: https://github.com/sidddy/flora Installation Arduino IDE installieren In der Arduino IDE File> Preferences öffnen Den Pfad „https://dl.espressif.com/dl/package_esp32_index.json“ unter “Additional Board Manager URLs” eintragen und OK… Read more »
As you can see from the image, there are S5, S6, K6 and K5. CAUTION: Please cut off the power supply before switching S5, S6, K5, K6. Whether you use DC or AC input, make sure you have unplugged the power plug every time!!!It’s very dangerous if you don’t cut off… Read more »