XAMPP
- Install XAMPP (https://www.apachefriends.org/de/index.html) to the directory „C:/xampp“
- Open Config of Apache (File: httpd.conf)

- Enter the root directory of the web server (localhost) at DocumentRoot
e.g.
DocumentRoot "D:\05_Insomnia\Humor Nacht\TicketSystem"
<Directory "D:\05_Insomnia\Humor Nacht\TicketSystem">- Open Shell in XAMPP Control Panel

- Run the command:
php -i > phpversion.txt- Open „C:\xampp\phpversion.txt“ in a text editor
- Copy the whole content of the file
- Go to the website https://xdebug.org/wizard.php to find the correct xdebug version
- Paste the content of the file and click the „Analyze my phpinfo() output“ button.
- A download link is generated with the right XDebug version for XAMPP.
- Download php_xdebug-xxxxxxxxxxxx.dll
- Move the downloaded file to „C:\xampp\php\ext“
- Edit „C:\xampp\php\php.ini“ and add the lines:
[Xdebug]
zend_extension = C:\xampp\php\ext\php_xdebug-xxxxxxxxxxxx .dll
xdebug.remote_enable=1
xdebug.remote_port=9000
- Restart Apache by click stop and start in the XAMPP Control Panel
MySQL
Set password for root user
By default, when you install XAMPP, the password of the „root“ user for MySQL is not set. But it is recommended to set one to protect your database.
- Start the Apache Server and MySQL from the XAMPP control panel
- Open the Admin Panel of Mysql by clicking on „Admin“-Button under MySQL or open http://localhost/phpmyadmin/
- Select the SQL tab to enter a SQL querys.
- Enter the following querries. Replace ’new_mysql_password‘ with youtr password and click the Go Button
ALTER USER 'root'@'localhost' IDENTIFIED BY 'new_mysql_password';
ALTER USER 'root'@'127.0.0.1' IDENTIFIED BY 'new_mysql_password';
- Now you will see a message saying that the query has been executed successfully.
- If you refresh the page, you will be getting a error message. This is because the phpMyAdmin configuration file is not aware of our newly set root password. To set this we have to modify the phpMyAdmin config file.
- Therforce go to the XAMPP Control panel and click on the Config-Button under Apache. Choose the config file „config.inc.php“ (or open C:\xampp\phpMyAdmin\config.inc.php)
- Search the string $cfg[‚Servers‘][$i][‚password‘] = “; and change it to $cfg[‚Servers‘][$i][‚password‘] = ’new_mysql_password‘;
- Set also $cfg[‚Servers‘][$i][‚AllowNoPassword‘] = false;
- Save the config.inc.php file and restart the XAMPP server. (stop and start)
Import existing database
- Export the database that you want to import (perhaps from an existing website)
- Use the SQL format

- Start the Apache Server and MySQL from the XAMPP control panel
- Open the Admin Panel of Mysql by clicking on „Admin“-Button under MySQL or open http://localhost/phpmyadmin/
- Select the Import tab
- Select the exported Database that you want to import
- Click OK to import the database

Eclipse PDT
- Download Eclipse Installer from https://www.eclipse.org/
- Start the installer and choose Eclipse IDE for PHP Developers
- Open Eclipse
- Create a new PHP Project or open an existing Project
- Open the project properties by a right click on the project in the Project Explorer
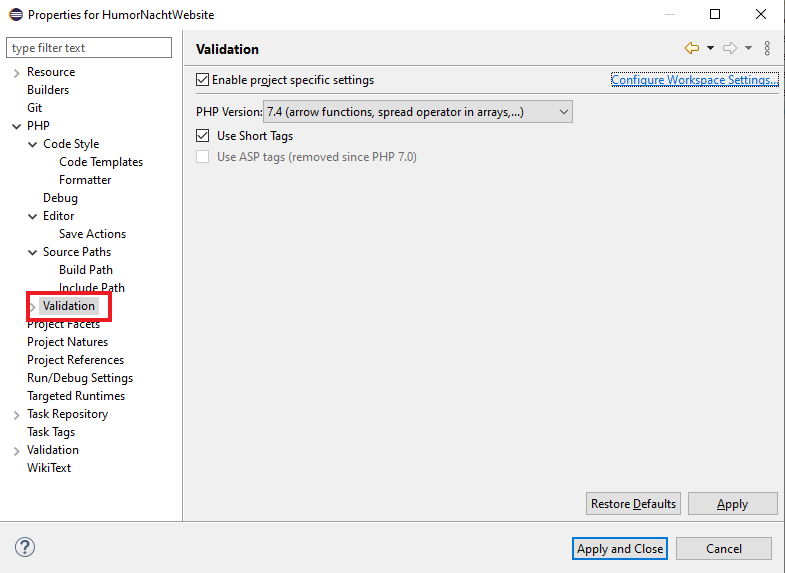
- Select the preferred PHP Version under PHP –> Validation
- Edit the PHP Server
- Therefore, open Preferences of Eclipse (Window –> Preferences)
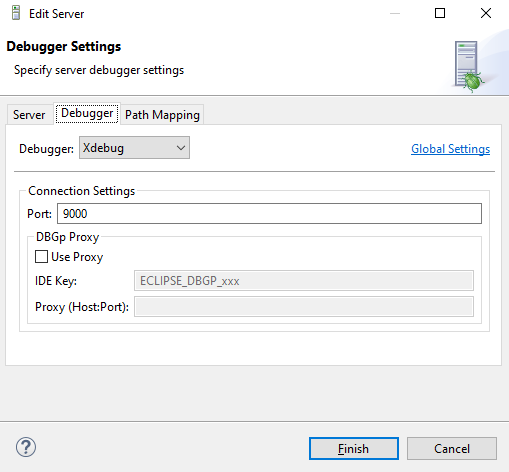
- Select Servers under PHP and press to Edit

- In the server tap you can enter the base url and document root, if the localhost of the Apache web server is not set directly to this project.

- The the debugger tab, you can set the debugger (Xdebug on Port 9000)
- In the path mapping you can set the project path relative to the document root

- If all is configured correctly. You can right-click on a php file in the project explorer and click Run as –> PHP Web Application
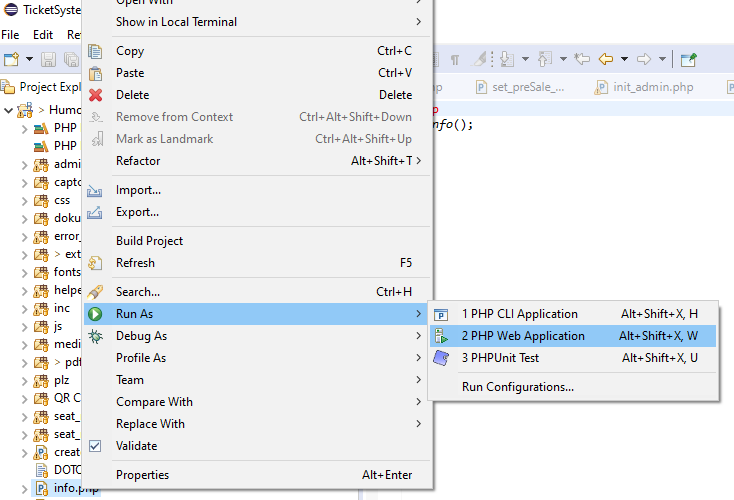
- The correct path should be displayed in the window that is opened.
- When pressing ok, the executed php File should showed in a browser