- SSH into your NAS. You may have to run
sudo suif you are getting permission errors. - Download the docker-statsd-influxdb-grafana image using the command:
docker pull samuelebistoletti/docker-statsd-influxdb-grafana - To start the container for the first-time launch:
docker run -d \ --name docker-statsd-influxdb-grafana \ -p 3003:3003 \ -p 3004:8083 \ -p 8086:8086 \ -p 22022:22 \ -p 8125:8125/udp \ samuelebistoletti/docker-statsd-influxdb-grafana:latest - The image should now be running and both InfluxBD and Grafana should be now up and running.
- You can access InfluxDB at http://NAS_IP_ADDRESS:3004/ and Grafana at http://NAS_IP_ADDRESS:3003/
- Navigate to http://NAS_IP_ADDRESS:3004/ and create the database
home_assistantusing the commandCREATE DATABASE home_assistant. -

- If Webserver dont show anything: login to te docker container over ssh:
Address: NAS_IP_ADDRESS
Port: 22022
user: root
Password: root
Then create Database
-
influx -
CREATE DATABASE home_assistant
https://hub.docker.com/r/samuelebistoletti/docker-statsd-influxdb-grafana/
- Now, you need to configure Home Assistant to use InfluxDB. Since, we did not add any username/password to our database, we can simply add the following to our configuration.yaml (replace the IP address with that of the device running Docker) and restart Home Assistant to setup InfluxDB (you will have to fine tune it based on your preferences):
influxdb: host: 192.168.2.113 - Next, we need to configure Grafana to use InfluxDB. Navigate to http://NAS_IP_ADDRESS:3003/ to access Grafana (login with username and password
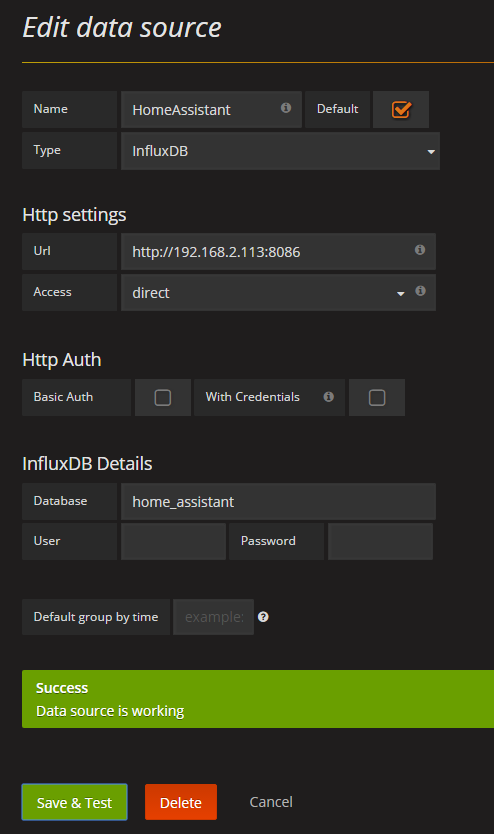
root) and add your first data source. Here’s how you can configure Grafana to use InfluxDB database. Note that 192.168.2.113 is the IP address of my NAS. - HTTP Settings: http://NAS_IP_ADDRESS:8086
- You should see
Data source is workingif you have configured everything correctly. - With all that configured, you are now ready for the fun stuff. You can create as many dashboards as you want and then import the same in Home Assistant.
- To add the Grafana dashboard in HA, use the following config:
panel_iframe:
  router:
    title: 'Temperature'
    url: 'http://192.168.2.113:3003/dashboard/db/temperature?edit&tab=time%20range'
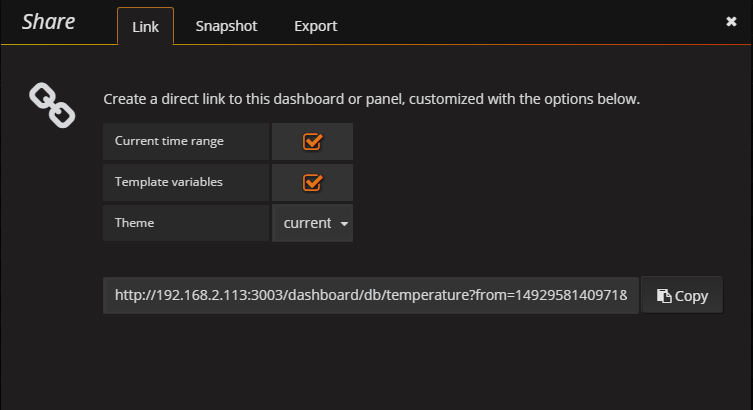
The URL can be obtained by clicking Share Dashboard link on your dashboard: